Getting Started with your 9Barista
Instructions
Using the machine is quite straightforward, but to make it even easier we’ve put this guide together to walk you through every step in the brewing process. We’ve included a few useful ‘tips and tricks’ at the end of the article.
Before you begin be sure to set aside the spare boiler o-ring and safety ring, which you’ll find in a small brown envelope. Next, give your heat transfer plate or induction plate a quick rinse with soapy water and dry it with a towel or cloth, making sure it’s completely dry.
We recommend that you run a cycle without any coffee the very first time you use your machine. To do this, follow steps 1, 3 and 4 below. When that’s complete, you’re ready to get brewing, this time following all the steps below:
Step 1: Adding water
Fill the boiler with 120g of water, or just below the ‘fill to here’ line. We recommend using filtered water to prevent the build up of limescale, which can affect the functioning of your machine. It’s important that you don’t fill beyond this amount or you may find that water spits out of the chimney. Next, screw the grouphead onto the boiler, taking care to do this gently so as not to spill any of the water. Tighten until you can see that there is contact between the top of the boiler and the bottom of the grouphead, creating a seal.
Step 2: Preparing the coffee
Freshly ground coffee: We strongly recommend using freshly roast coffee beans and grinding them with a grinder designed for espresso just before you use them, although you can also use pre-ground coffee if you must.
Choosing your dose: One of the parameters you can adjust with 9Barista is the weight of ground coffee you use in the basket. We recommend starting with 18g. It’s a good idea to weigh out the exact quantity of beans each time, and only grind that much.
Grinding the beans: The fineness of the grind is possibly the most important parameter when making espresso – it makes a big difference to the flavour. The grind size will determine how long the extraction takes; that is, how long the water is in contact with the beans for. We measure this by timing how many seconds it takes for the espresso to fill the portafilter, from when it first appears to when it stops rising. The aim is 25-30 seconds. Use the setting on your grinder recommended for espresso for the first attempt, and then adjust as necessary. If in doubt, grind coarser and gradually go finer until you hit 25-30 seconds.
Put the ground coffee in the basket: Put the ground beans into the basket (you may wish to use a funnel to help keep things neat and tidy).
Tamping the beans: Evenly distribute the ground coffee in the basket before you tamp, by giving the portafilter a shake side to side, or by sliding your palm over the top of the basket. Then when you tamp, carefully keep the tamper horizontal, while you apply a firm push downwards – around 5kg of force is enough. After tamping, simply put the basket cap into the basket, being careful not to disturb the coffee.
Attaching the portafilter: You can now turn the portafilter back over and attach it to the grouphead. The portafilter will be sealed when the two handles are at 90 degrees to one another. When you first receive your machine it might be slightly stiff when closing the portafilter, but this gets much easier after a few uses. You’re now ready to put your machine on the heat.
Step 3: Heating the machine
Heat transfer plate: if you’re using a domestic gas stove, be sure to use the heat transfer plate that came with your machine. If using induction, you’ll need to use the induction plate. Take care to only start the heat when the 9Barista is sitting on the plate. You may also need to use it if you’re using another type of cooker (such as electric, coil or ceramic) and it’s taking more than 6 minutes for 9Barista to reach temperature and produce a coffee. Note: when using any stove other than induction, take care to keep the handles and chimney out of the direct heat wherever possible. You may need to place the machine with the handles slightly over the edge of the ring or the heat transfer plate to be sure of this. The heat transfer plate is not designed to be used on wok burner-style gas stoves, camping stoves (no plate is required on a camping gas stove) or industrial stoves as these produce excess heat and can damage the plate.
Heat level: It can take a couple of cycles to determine the best heat setting. We recommend starting with a medium to high heat on gas and electric stoves, and a medium heat for induction. If using a gas stove, use the ring which is closest to 3 inches in diameter. If using a wok burner or camping gas stove you’ll need to start with a low to medium heat. Don’t use the heat transfer plate with a camping gas stove. Instead, ensure the handles and chimney are out of direct line of the heat.
Brew time: We recommend timing your first few attempts so that you can be sure your machine is taking between 3 and 6 minutes to get up to temperature. If the machine is taking less than 3 minutes to start producing a coffee, you’ll need to turn the heat down on your next cycle, and if it’s taking longer than 6 minutes you’ll need to turn the heat up. NOTE: it’s important that the machine is not left on the heat for more than 8 minutes, so if it hasn’t produced an espresso by then you’ll need to take it off the heat and increase the heat next time.
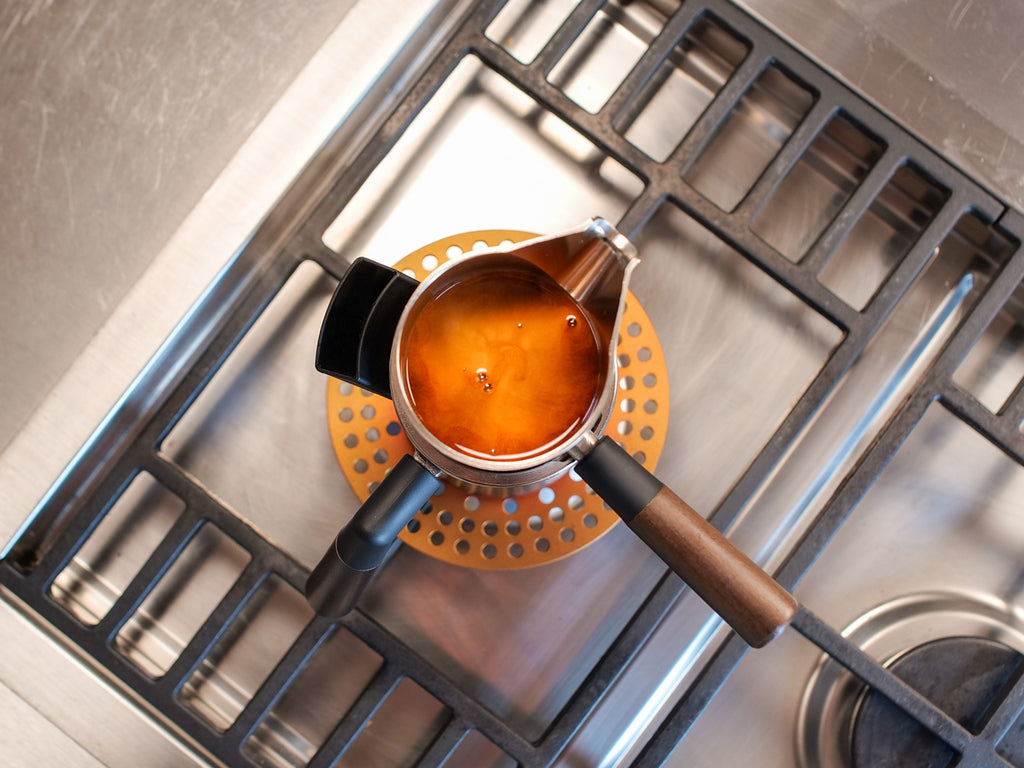
Extraction time: Once your machine has got up to temperature, steam will come from the chimney and then a short time after that espresso should start appearing in the portafilter. When espresso appears, it should take between 25 and 30 seconds to fill the portafilter. If it’s faster than that, you’ll need to grind your coffee more finely and if it’s slower you’ll need to grind more coarsely. You should notice an increased volume of steam for one to two seconds once the espresso has stopped rising. This is a good sign that all the water has left the boiler, the extraction is finished and you should take your machine off the heat.
Pouring your espresso: As soon as the extraction has finished, take your machine off the heat and pour (don’t be tempted to take the portafilter off as it may still be under pressure). Your espresso should weigh between 35 and 40g. NOTE: It’s important that you don’t leave the machine on the heat once the extraction is finished. If the machine is left on the heat after brewing the safety ring will activate and if the heat exchanger plate is left on the heat it may be damaged. We suggest turning off the heat as soon as the extraction is finished. There are two ways to be able to tell when your machine has finished extracting; the first is that the espresso will stop rising in the portafilter. You should also be able to see and hear a final, stronger flow of steam coming from the chimney, for one to two seconds, which signals that there’s no more water in the boiler and the extraction has finished. You should turn off the heat at this point and pour your espresso straight away.
Step 4: Cleaning
Cool down: Your machine will be very hot after brewing, although the handles will be cool as they are insulated. You can either leave it to cool naturaly or you can run it under the cold tap.There’s no risk of damaging your machine.
Vacuum release: When the machine is cold enough to grip, lift or pull the pressure release tab on the safety valve – it won’t move much, but you’ll hear a hiss as the pressure neutralises. Doing this makes unscrewing your machine much easier and also protects the boiler o-ring.
Disassembly: Next, simply disconnect the portafilter, taking care to do so carefully as there’s likely to be some watery coffee at the grouphead. Unscrew the boiler, knock the coffee grounds into a knock box or the bin, give everything a rinse and leave to dry. It’s now ready to be used again. Disassembling the parts over a kitchen sink can be a good way of keeping things easy to clear up.